Tips for Photographing Your Knitting Projects
Taking attractive photos of hand knit projects can take some practice. However, it's easier than ever to practice and improve photography skills thanks to the amazing capabilities of the digital cameras on most smart phones.
Over the last eight years, I have photographed all of my knitting samples for my 60+ knitting pattern designs. I have taken a lot of unattractive photos! But, through lots of trial and error, I have taken many successful, appealing photos. Based on those experiences, I have compiled a list of tips for photographing hand knit (or crochet) projects.
You don’t need fancy equipment to take good photos! I use the camera on my phone for many of my knitting project photos. Of course, if you have a nice digital camera… pull it out and put it to use!
IN THIS POST YOU WILL FIND:
A friendly reminder to block your hand knit project.
A list of tips for taking photos of your knitting or crochet projects.
Step-by-step tips for using Instagram filters to edit photos.
A before and after example of a photo edited with Instagram filters.
Ideas for saving your knitting project photos.
Ideas for photographing blanket knitting projects including several photo composition examples.
BEFORE TAKING PHOTOS OF YOUR HAND KNIT PROJECT:
Make sure your project looks it’s best! If the pattern for your knitting project recommends blocking… be sure to block the project before taking photos.
Click here to see my tips on how to block a hand knit blanket or scarf project.
TIPS FOR TAKING PHOTOS OF YOUR KNITTING OR CROCHET PROJECTS:
Natural light is best!
Turn off all lamps and ceiling lights.
Arrange your project near a window with soft daylight. Or, take your project outside to a gently lit space.
Avoid harsh, direct sunlight. An overcast day is great for photos.
Turn off the flash on your camera. Today’s smartphone cameras handle low lighting very well.
Arrange your knitting project neatly in a neutral or attractive environment.
Clear clutter out of view.
If you like, incorporate a few props (plant, book, knitting tools, ribbon, etc.) to set the scene and add interest to your photo. Be sure the props don’t hide your project!
Sometimes a large knitting project can be folded to a manageable size. As long as folding does not hide key elements of the design!
Check that the ‘right side’ of your project is showing.
If you are using a model (friend or family member!) to hold and display your project, think about whether you want the model to show fully in the photo or if you will focus in on the project.
Step back and take a look at the set-up.
Check the background! If there’s something unattractive behind your project: move the distracting object, move your project or adjust your photo view to eliminate the unattractive object.
Take a couple photos and then look at the results on your phone display.
Adjust as needed… lighting, view angle, proximity to the subject.
Take lots of photos!
Try a couple different views and angles of the project… including close up.
Take at least 10 – 20 shots.
Later, you can pick your favorites and delete the rest.
Experiment with editing tools on your phone.
Use the crop tool to change size of photo or edit out unnecessary edges.
Use the “brightness” adjustment to quickly lighten an image.
Use Instagram photo editing filters. Photo editing filters are a helpful tool that can transform a photo from ‘plain’ to ‘wow’. See more on Instagram filters below!
Try other online photo editing tools. There are several free (or paid) online software tools including Canva, Picasa, and PicMonkey.
If you don't like how your photos turn out... try a different location, different lighting or a different angle. Often, it takes many attempts to get the photo that really captures my knitting projects.
In this photo of four of my winter scarf knitting patterns, I layered the scarves on my white craft table. After trying several viewpoints, I found that the best view of the stitch textures was to take the photo at an angle where the natural light from the nearby window was coming from the upper left corner. My collection of 1970’s vintage knitting needles in a glass vase is slightly blurred due to the light. Click here to get more details about my winter scarf knitting patterns.
USING INSTAGRAM FILTERS TO EDIT PHOTOS:
Filters are preset combinations of editing tools that can transform an average photo into a ‘wow’ photo. If you like the composition of your photo but the colors and lighting appear ‘flat’… try using preset filters on Instagram.
One of my favorite features of Instagram is using the filters to modify a photo… and then save the edited version to my phone without having to post the photo on Instagram.
To use Instagram photo editing filters:
Open Instagram.
Tap the + button to ‘add a post’. (Look at the top right of screen.)
Select the photo from your phone that you want to edit.
Click ‘next’ in the upper right corner.
Experiment with the many filter options shown below the photo. My favorite Instagram filter settings are Lark, Juno, Clarendon and Gingham. Different filters will give substantially different results. The choice of which filter to use depends on what improvements are needed with a particular photo and personal preference.
For example, tap the “Lark” filter two times and then adjust the level of the filter on a scale of 1 - 100. The higher the number… the more change to the photo. When I find the filter that is working best with the photo, I usually set the adjustment scale to somewhere between 25 – 65.
When you like the filter results… click ‘Done’.
Save the photo to your phone by tapping the small ‘down arrow’ at the top of the screen.
If you want to post the photo to your Instagram account… click the ‘next’ button.
Need help with navigating Instagram and the photo editing tools? Ask someone younger than you for some help! Perhaps you have a child, grandchild, niece, nephew or neighbor who would be the perfect person to teach you how to navigate your phone’s photo editing options or Instagram filters.
ONE EXAMPLE OF A PHOTO EDITED WITH INSTAGRAM FILTERS:
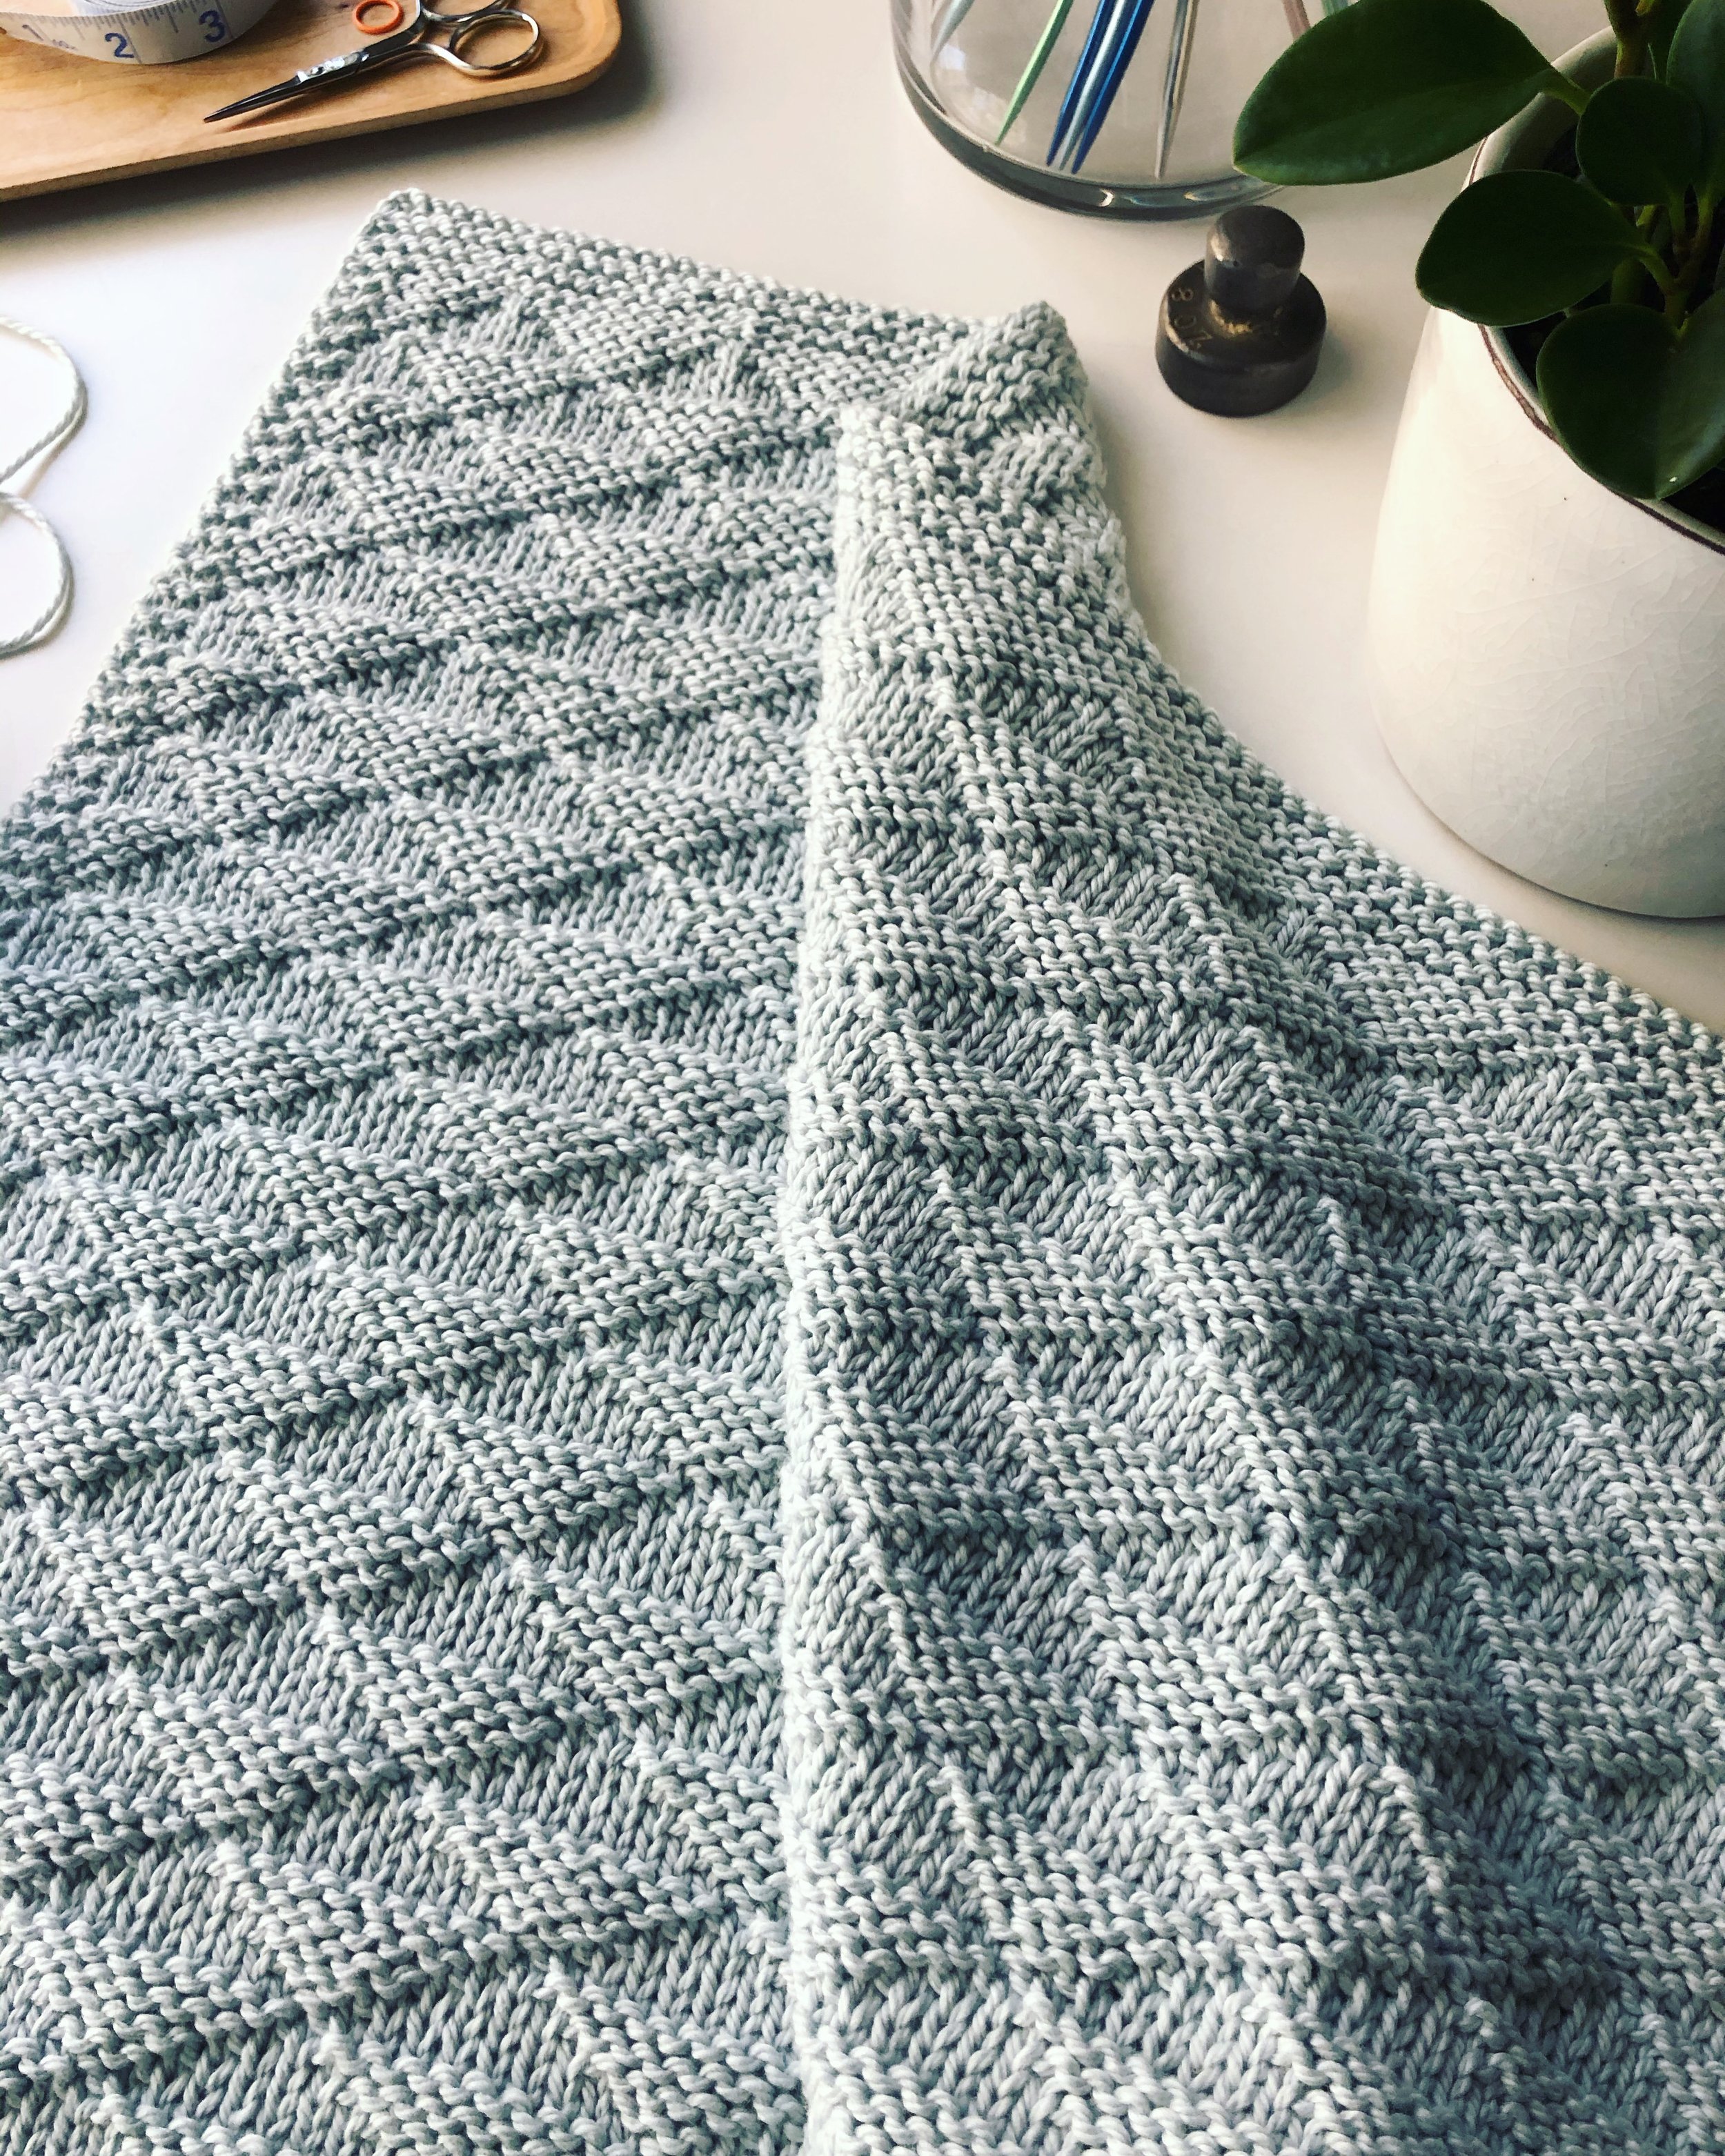
I used Instagram’s Clarendon filter at the 60 setting for this photo of my Touch of Kindness blanket sample. The Clarendon filter brightened the whites and enriched the blues of the blanket.
The transformation more closely represents the actual color of the yarn. I used Blue Sky Fiber’s Spud & Chloe Sweater in the ‘Sea Horse’ colorway. Click here to get more details and purchase the Touch of Kindness blanket knitting pattern.
For this photo of my Touch of Kindness blanket sample, I used Instagram’s Clarendon filter at the 60 setting. See the ‘before’ version of this same photo below.
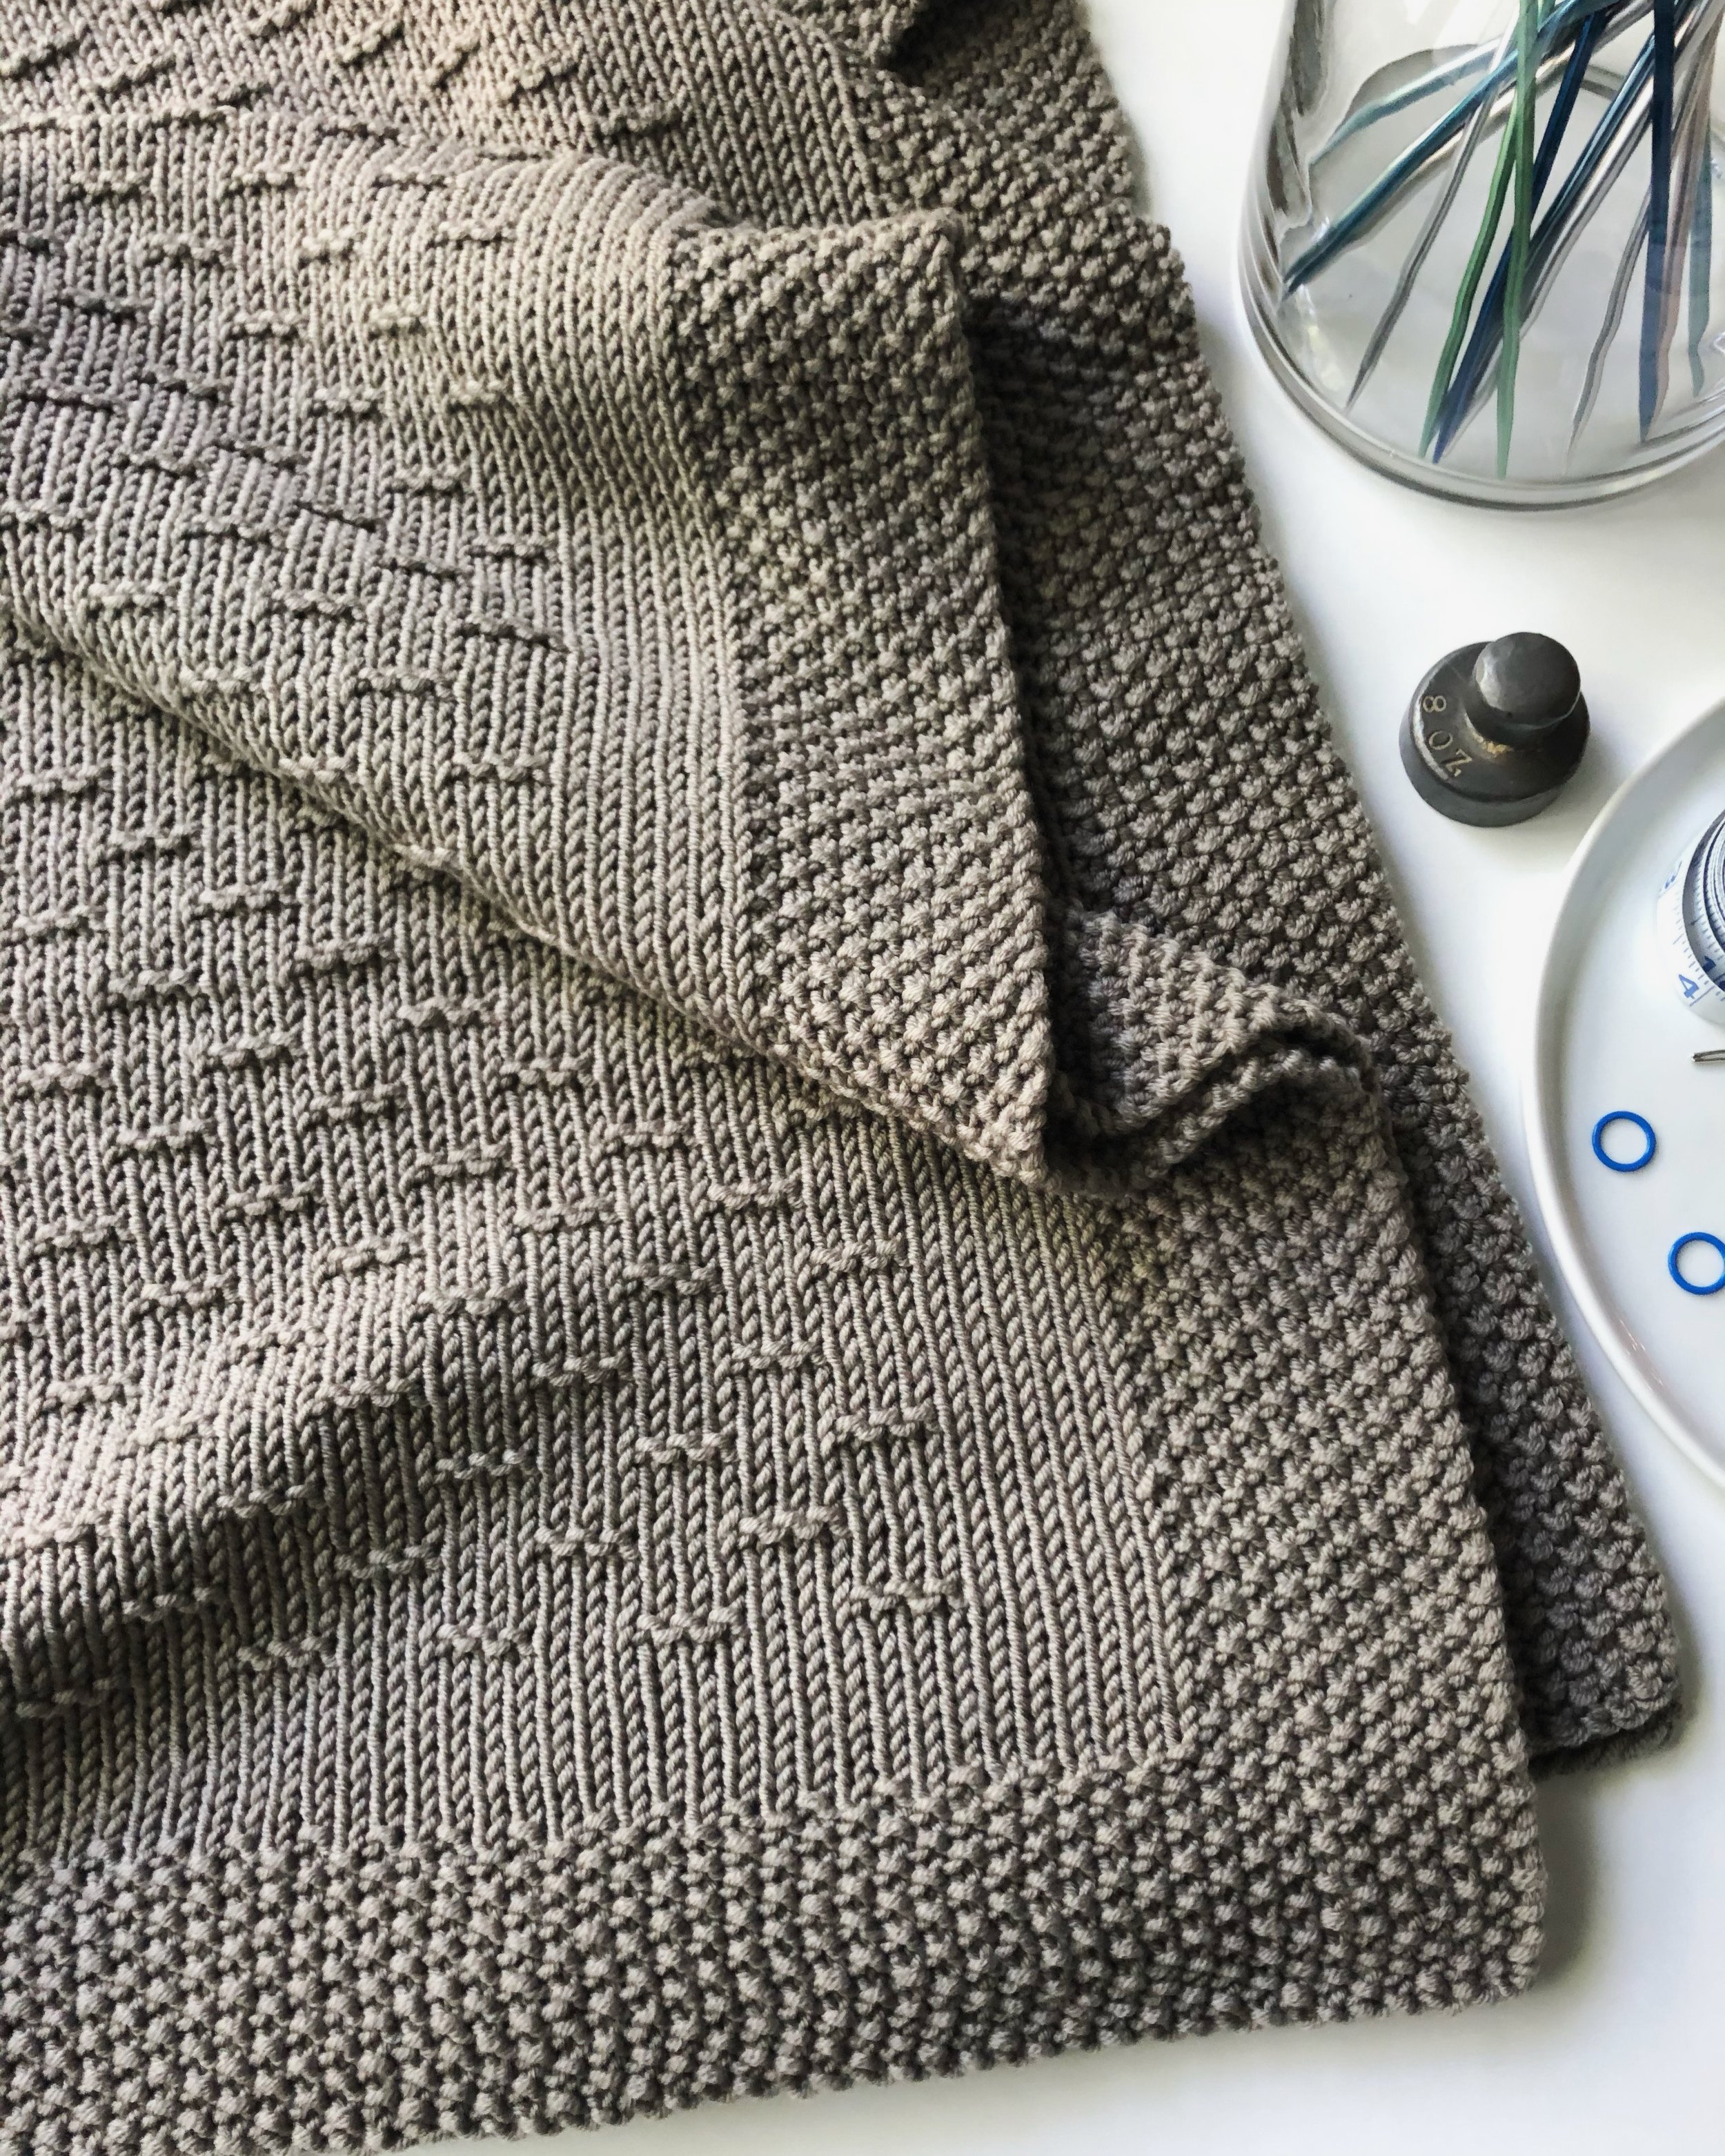
Before editing the photo, the yarn color appeared more gray than light blue. And, the white areas were yellow tinted. The entire photo appeared sort of ‘muddy’. I liked the composition and the clear appearance of the stitch design. A quick edit with Instagram’s Clarendon filter completely transformed the photo! (See previous photo.)
SAVE YOUR PROJECT PHOTOS:
Here are a few ways to keep a record of your finished projects…
On Your Phone: Create a “knitting” or “finished projects” folder on your phone.
A Project Notebook: Print your project photos and keep a notebook or journal of all of your completed knitting or crochet projects.
Ravelry Projects: If you use Ravelry, you can add your knitting and crochet projects (with photos) and keep a record with details about the yarn you used, size made, as well as any notes about making the project.
To add a Ravelry project, log into Ravelry and then click “my notebook”. Then select “projects” from the drop down menu. Then click “add a project” button (left side of computer screen). Fill in the name you would like to use for your project and the name of the pattern you used. Then you can add photos and details about your project.
Click here to see all of my Ravelry projects that I have posted over the last eight years.
PHOTO COMPOSITION - IDEAS FOR PHOTOGRAPHING BLANKET KNITTING PROJECTS:
Here are a few of my favorite blanket knitting project photos that I have taken in recent years.
Often, it took many adjustments… as well as taking 50 - 100 photos… to get one photo that captured my knitting design in an attractive composition and viewpoint.
ALL THESE PLACES BLANKET: This photo of my All These Places blanket is one of my all time favorites. The blanket is draped over the edge of a bed with most of the blanket neatly smoothed out to show the stitch pattern. The upper left edge of the blanket is purposefully a bit wrinkled to show some dimension. The basket placed in front of the bed echoes the basket weave stitch in the blanket and adds another color to the photo. The book visually anchors the blanket on the bed. And, the leaves of the plant provide visual ‘arrows’ directing our eye back to the center of the photo.
ON THE PORCH BLANKET: This photo of my On the Porch blanket is an example of keeping things simple and letting the project be the ‘star of the show’. Of course, a neutral yarn color with great stitch definition was key to this project and the photo. It’s Blue Sky Fibers Organic Cotton Worsted in the ‘Drift’ colorway. The 33” x 38” blanket was folded twice so the blanket is a square shape draped on a neutral colored couch. A window on the left (out of view) provides natural lighting. The wood picture frame (upper right) and the dark colored book (lower right) create subtle ‘arrows’ directing the viewer’s eye to the focal point of the photo… the blanket.
STAY ON THE RIDGE BLANKET: Here, my Stay on the Ridge blanket is displayed on my white craft table in my home studio. The blanket was folded twice and arranged on the table with a couple of gentle wrinkles to show the drape of the knitted piece. Soft, natural light filters in from the window on the left. My collection of vintage knitting needles in the glass vase create visual lines.
Those who have followed me on Instagram for a while know that my treasured, vintage 8 oz weight is a signature piece in nearly all of my flatlay style photos.
Thanks for taking a minute to check out my knitting patterns available here on my website and Ravelry.
Thanks for reading! I hope that you found some inspiration and ideas for taking photos of your hand knit projects.


